
Learn how Muay Thai students in Mississauga check kicks: shin angle, posture, weight distribution, timing drills, and the common mistakes beginners can avoid.
The low kick is one of the signature weapons of Muay Thai, and for a new student it can be an eye-opening experience the first time a partner lands one on the thigh during a drill. Even at controlled speed, you feel exactly why the technique is respected. The natural question follows quickly: how do you stop it?
The answer most coaches in Mississauga and elsewhere give is the check, a defensive technique where you lift your leg and meet the incoming kick with your shin. It sounds straightforward. In practice, it takes time to develop the timing, balance and confidence to check kicks reliably, and it involves more of the body than just the leg.
This article explains how checking works, the details beginners in Mississauga tend to miss, and how to practise the skill safely so it becomes an instinctive part of your defence.
What a check actually does
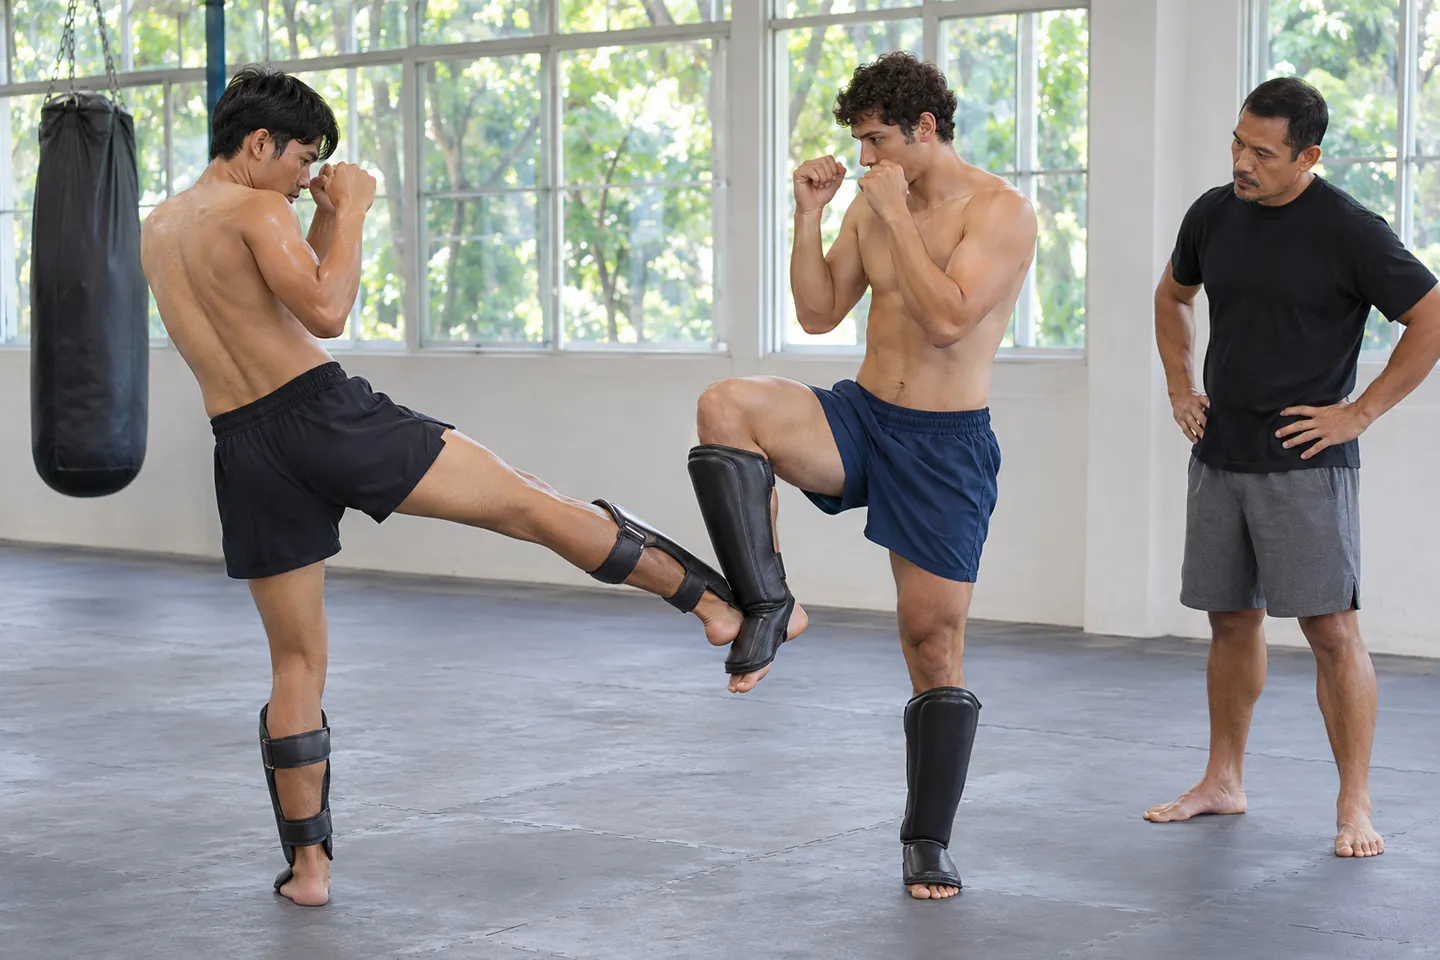
When a round kick comes toward your lead or rear leg, the target is usually the muscle of the outer or inner thigh, or sometimes the calf. A check places the hard, bony part of your shin in the path of that kick. Instead of landing on soft tissue, the kick meets bone and loses much of its effect.
A well-timed check also disrupts your opponent’s rhythm. They have committed their weight to the kick, and the impact on your shin can make them hesitant to throw it again. In some cases, it creates an opening for you to counter while they recover their balance.
It is important to understand that checking is not about kicking back at the incoming kick. You are not trying to smash their shin. You are simply placing your leg in a strong, stable position so the kick hits the part of your body best able to absorb it.
The basic mechanics
Start from your normal Muay Thai stance, weight balanced and hands up. To check with your lead leg, lift that knee upward and slightly outward, turning it toward the direction the kick is coming from. Your shin should be roughly vertical or angled slightly forward, with your foot relaxed and close to your opposite knee.
The height of the check matters. Lift high enough that your shin covers your thigh, but not so high that you lose balance or expose your body. For most people, bringing the knee to around hip level works well, though coaches may adjust this depending on your build and the kicks you face.
Your hands stay up throughout. A common mistake is dropping the hands when the leg lifts. Opponents often throw a kick to the leg and follow it immediately with a punch or a high kick, so your guard needs to stay in place even while you balance on one foot.
Balance comes from the standing leg
The leg doing the checking gets most of the attention, but the leg you are standing on is just as important. If your support leg is stiff or your weight is on your heels, a kick can knock you off balance even when your check is in the right place.
Keep a slight bend in the standing knee and your weight over the ball of the foot. Your hips should stay roughly square, and your upper body should stay upright rather than leaning away from the kick. Leaning back may feel natural, but it shifts your centre of mass and makes you easier to push over.
Many beginners benefit from simple balance drills outside of partner work. Standing on one leg with your guard up, lifting your knee into the check position and holding it for a few seconds, then alternating sides, builds the stability needed to check under pressure. Practising in front of a mirror can help you spot posture issues.
Timing and reading the kick
Checking too early lets your opponent see the defence and change their target. Checking too late means the kick lands before your shin arrives. Good timing comes from reading small signals that a kick is coming.
Watch the hips and shoulders rather than the feet. A round kick usually starts with a step, a shift of weight, or a turn of the hips. Experienced fighters can disguise these signals, but beginners and intermediate students tend to show them clearly. Your coach will often point out these cues during drills.
At first, timing will feel slow and awkward. That is normal. Repeated, controlled drills help you build an association between the visual cue and the movement of your leg. Over time, the check becomes more automatic, and you can focus on what to do after it.
Common mistakes and how to fix them
One of the most frequent errors is lifting the leg straight up with the knee pointed forward. This leaves the side of the thigh exposed. Turning the knee outward toward the kick, even slightly, brings the shin into a better blocking position.
Another common mistake is pulling the foot back too far, so the lower leg points behind you. That reduces the area of shin covering your thigh. Keep the foot roughly under your knee or slightly in front of it, with the toes relaxed.
Some students also turn their body away from the kick, flinching instead of checking. This is understandable, especially early on, but it tends to expose the back of the leg and make balance worse. Staying facing your partner, hands up and eyes forward, is safer and more effective. A coach in a Muay Thai class will notice these habits and give you specific corrections.
Checking with the rear leg
Most early drilling focuses on checking with the lead leg, because that is where many low kicks land. Rear-leg checks are also important, especially against opponents who switch stance or target your back leg.
Lifting the rear leg is a bigger movement because more of your weight sits on it. You may need to shift your weight forward onto your lead leg slightly before checking. That shift needs to be quick and controlled, otherwise you will be off balance when the kick arrives.
Practise rear-leg checks slowly at first, focusing on balance and posture. Once you are comfortable, a partner can throw light kicks to your back leg so you can work on timing. As with lead-leg checks, keep your hands up and your eyes on your partner.
Safe drills for beginners
When you first start learning to check, the priority is building good habits without injury. Shin guards are usually worn for partner drills, and the kicks should be thrown slowly and with control. The goal is to practise position and timing, not to test toughness.
A simple progression starts with shadow drilling. Throw a few strikes, then lift into a check, return to stance, and continue. This builds the movement pattern without any contact. Next, a partner can throw slow kicks toward your leg so you can practise lifting into the check and returning to your stance.
As you improve, the drills can include combinations. Your partner might throw a jab followed by a low kick, or a kick followed by a punch. You practise checking and then countering or keeping your guard intact. These drills are usually done in pairs during class, and the coach will set the pace.
Conditioning the shins sensibly
People often ask about shin conditioning, and there are many stories about extreme methods. For recreational students, a sensible approach is much safer. Regular, controlled bag work and partner drills gradually help the legs adapt to impact.
Start with light kicks on a heavy bag and build up the number and power of kicks over weeks and months. Pay attention to how your shins feel. Some soreness is common when you are new, but sharp pain, swelling that does not go away, or bruising that lingers are signs to rest and, if needed, speak with a qualified health professional.
There is no need to rush this process. Many experienced practitioners have trained for years with no special shin conditioning methods beyond consistent, sensible practice. Your shins will adapt to the training you do, and recovery time is part of that adaptation.
When not to check
Checking is a valuable tool, but it is not the only answer to a low kick. Sometimes stepping back, moving off the line of attack, or countering with a punch is a better choice. Experienced fighters choose their defence based on distance, angle and the type of kick being thrown.
For example, if your opponent is throwing a long kick from outside range, stepping back may be simpler. If they are throwing quick, light kicks to set up something else, a check may be ideal. Learning to recognize these situations comes with experience in drills and controlled sparring.
Your coaches will introduce these alternatives gradually. As a beginner, focusing on solid checks gives you a strong foundation. Once you are comfortable, you can start to explore other defensive options.
Building the skill over time
Like any technical skill, checking improves with consistent practice. Attending class regularly, practising the movement in shadowboxing, and paying attention to coaching feedback all add up. It is common to feel awkward for the first few weeks and then notice a sudden improvement as the movement becomes familiar.
Strength and mobility training can also help. Hip flexor strength, balance on one leg and core stability all play a role in how well you can lift your leg and hold a check. A strength and conditioning class can support your Muay Thai training by building these qualities.
Patience is key. Kicks come in at different speeds and angles, and it takes time to develop a reliable response. Every drill and every round is a chance to learn something about your timing, balance and positioning.
Learning to check kicks in Mississauga
If you are training Muay Thai in Mississauga or thinking about starting, checking kicks is one of the first defensive skills you will practise. It is also one of the most rewarding, because it gives you a sense of control and confidence when facing kicks in drills and sparring.
At Konga Fitness, the Muay Thai program teaches checking and other defensive skills in a supportive, structured environment. Students who also enjoy kicks and punches in a fitness-focused setting can explore kickboxing classes. To see how the training feels, you can book a free trial and work with coaches who will help you build the technique safely from the ground up.
Filed under
Keep exploring
More training insights await.